How do I assemble an AutomatiQ hub interface?
As alternative to the video we also offer a technical description:
Ensure you have the correct AUTOMATiQ hub Interface for your internal gear hub.
enviolo CT/CO/TR have one axle diameter (44T) and enviolo CA/SP/HD, a different one (40T).
You can find the identification of the AUTOMATiQ Hub Interface variant at the bottom of the hub interface.
Use the uninstalled enviolo hub interface to determine the desired orientation.
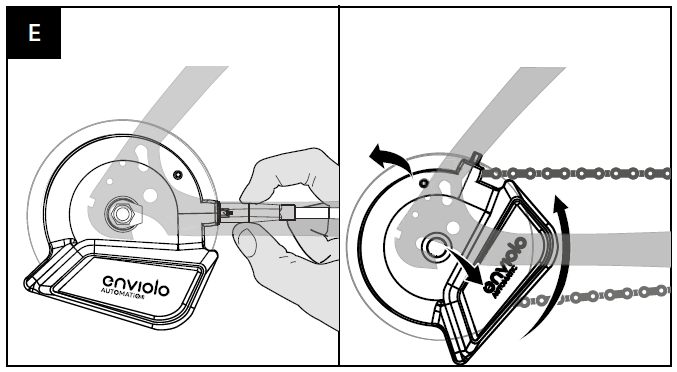
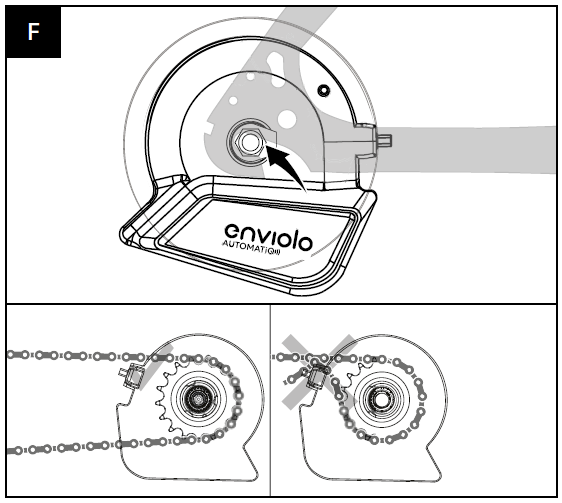
Orientation should be forward, parallel to the chain stay with the automatic main connector facing forward. Move the AUTOMATiQ Hub Interface along the dropout to ensure clearance at different axle positions. With the AUTOMATiQ Hub Interface oriented correctly inside the right dropout, the installation angle is the indicated angle of the dropout (20 degrees in this example).
Use a scratch pen or marker to mark the hub interface in the middle of the dropout. Remove the anti-shift retainer, if installed.
Suspend the AUTOMATiQ Hub Interface over the right hand axle, and align the axle flats with the
marked position.
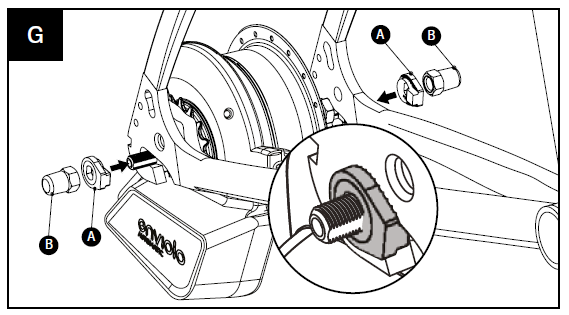
Alternatively, a non-turn washer can be installed over the AUTOMATiQ Hub Interface to align the installation angle.
When the installation angle is aligned seat the AUTOMATiQ Hub Interface fully onto the axle.
Thread the right hand nut, serrations facing outward, onto the axle and tighten it to 10-15 Nm (7-11 ft-lbs).
Install the rear wheel.
Once assembled the hub interface should not touch the frame.


